- 您現(xiàn)在的位置:買賣IC網(wǎng) > PDF目錄23328 > 050-327-7609229 (ITT Corporation) RF Coaxial Connectors PDF資料下載
參數(shù)資料
| 型號: | 050-327-7609229 |
| 廠商: | ITT Corporation |
| 英文描述: | RF Coaxial Connectors |
| 中文描述: | 射頻同軸連接器 |
| 文件頁數(shù): | 42/42頁 |
| 文件大小: | 489K |
| 代理商: | 050-327-7609229 |
第1頁第2頁第3頁第4頁第5頁第6頁第7頁第8頁第9頁第10頁第11頁第12頁第13頁第14頁第15頁第16頁第17頁第18頁第19頁第20頁第21頁第22頁第23頁第24頁第25頁第26頁第27頁第28頁第29頁第30頁第31頁第32頁第33頁第34頁第35頁第36頁第37頁第38頁第39頁第40頁第41頁當前第42頁

Dimensions are shown in mm (inch)
Dimensions subject to change
110
RF Coaxial Connectors
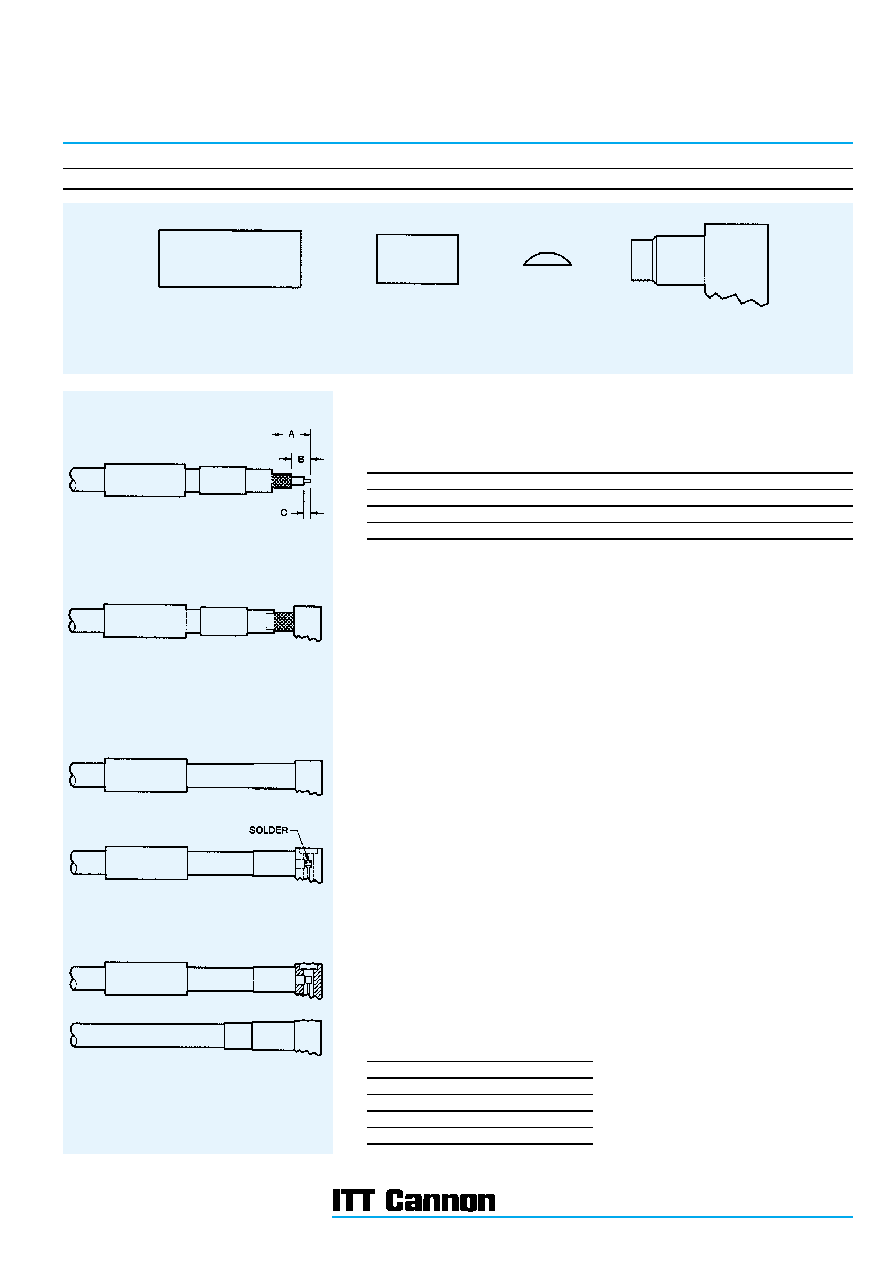
Assembly Instructions
AI-90, AI-237, AI-773 & BBAI-1212
SMA & MCX Right Angle Connectors, Crimp Type for Braided Cable
HEAT SHRINKABLE
TUBING
CRIMP
FERRULE
CAP
BODY ASSEMBLY
1. Slide ferrule and (if supplied) heat shrinkable tubing on to cable.
2. Trim cable to dimensions shown.
3. Tin center conductor (DO NOT OVER TIN).
4. Slide body over cable dielectric and under the braid until braid is flush against under-side of body.
Ensure center conductor is located in the forked end of the contact.
NOTE: When using cables with inflexible jackets it is permissible to make two 3,17 (.125)
longitudinal slits in the outer jacket.
5. Slide ferrule flush against the body and crimp in position using ITT Cannon’s Crimp Tool and
suitable die set (see table).
6. Using a small soldering iron solder center conductor to contact.
NOTE: The center conductor should not protrude beyond the contact or touch the body. Solder
should not protrude beyond the slotted section of the contact.
7. Locate the cap in rear of body and dimple or lightly punch to ensure it is locked in position.
8. Slide heat shrinkable tubing over ferrule flush against body and heat until tubing shrinks down.
Only common cable retention features are shown in detail. Various body configurations can apply.
Cable
Cable Code
Die Size
RG142/U
9142
5,42 (.213)
RG196/U
9196
2,67 (.105)
RG316/U
9188
3,25 (.128)
RD 316
9399/9875
3,84 (.151)
Assembly Instruction No.
A
B
C
AI-90 & AI-237
11,10 (.437)
5,16 (.203)
1,57 (.062)
AI-773
11,68 (.460)
4,55 (.179)
1,78 (.070)
BBAI-1212
8,50 (.335)
3,00 (.118)
2,00 (.078)
相關PDF資料 |
PDF描述 |
|---|---|
| 050-328-3188 | RF Coaxial Connectors |
| 050-328-7508229 | RF Coaxial Connectors |
| 050-328-7509229 | RF Coaxial Connectors |
| 050-424-3188220 | RF Coaxial Connectors |
| 050-424-3196220 | RF Coaxial Connectors |
相關代理商/技術參數(shù) |
參數(shù)描述 |
|---|---|
| 0503283082 | 制造商:Molex 功能描述:RING TONGUE TERM 16AWG TIN - Bulk |
| 050-328-3188 | 制造商:ITT 制造商全稱:ITT Industries 功能描述:RF Coaxial Connectors |
| 050-328-3875-910 | 制造商:ITT Interconnect Solutions 功能描述:Electronic Component 制造商:ITT SEALECTRO 功能描述:Electronic Component |
| 050-328-7508229 | 制造商:ITT 制造商全稱:ITT Industries 功能描述:RF Coaxial Connectors |
| 050-328-7509229 | 制造商:ITT 制造商全稱:ITT Industries 功能描述:RF Coaxial Connectors |
發(fā)布緊急采購,3分鐘左右您將得到回復。